
Using Trail Cameras to Enhance Nest Monitoring: Risks and Rewards
August 27, 2025By Robyn Bailey, NestWatch Project Leader
You can monitor nests for NestWatch without any tools at all, but many people find that using surveillance tools–such as security cameras, borescopes, and trail cameras–enhance the experience. I enjoy using trail cameras to gain insights into typically-unseen wildlife behaviors. You don’t need to be an expert to get started with trail cameras for nest monitoring, but we do have some tips to help you begin.
A trail camera (also called “game camera” or “camera trap”) is a small, weatherproof camera designed to take photos and/or videos automatically when motion is detected. These cameras are commonly used by wildlife researchers, hunters, and nature enthusiasts to observe animals remotely. Some benefits for NestWatchers are that there is less disturbance to the nest overall, and as the monitor, your time spent traveling to a potentially distant nest site is minimized.
Chuck-will’s-widow nest by Kyle Ross.
Choosing the Right Camera
For nest monitoring, you will want to choose a camera with features suited to your main objectives. For example, if you’d like to record interesting or unusual nest behaviors, you should choose a camera that has good video quality (high definition video in MPEG4 format and fast trigger speeds will help). Infrared lights for nighttime viewing are standard on most cameras and are a must if capturing predatory evidence is important. However, do NOT use any visible white flash at night because this would result in the nest being fully illuminated and could cause abandonment due to repeated motion-triggered flashes.
The activities at a nest can trigger the motion sensor hundreds or even thousands of times per day, so it’s important to consider battery life and memory storage. Currently, AA lithium batteries are considered the most efficient for trail cameras (Meek and Pittet 2012). You may also want to reduce the number of triggers by configuring your camera to have lower sensitivity or to take time-lapse photos (e.g., once an hour for a maximum of 24 photos per day). This would greatly reduce battery drain as well as the time it takes to review photos and videos, while still providing high-quality data for NestWatch. However, this approach is not ideal for capturing specific events like fledging, chick feeding, or predation. You will need to decide which tradeoffs are most important to you.
Getting Set Up
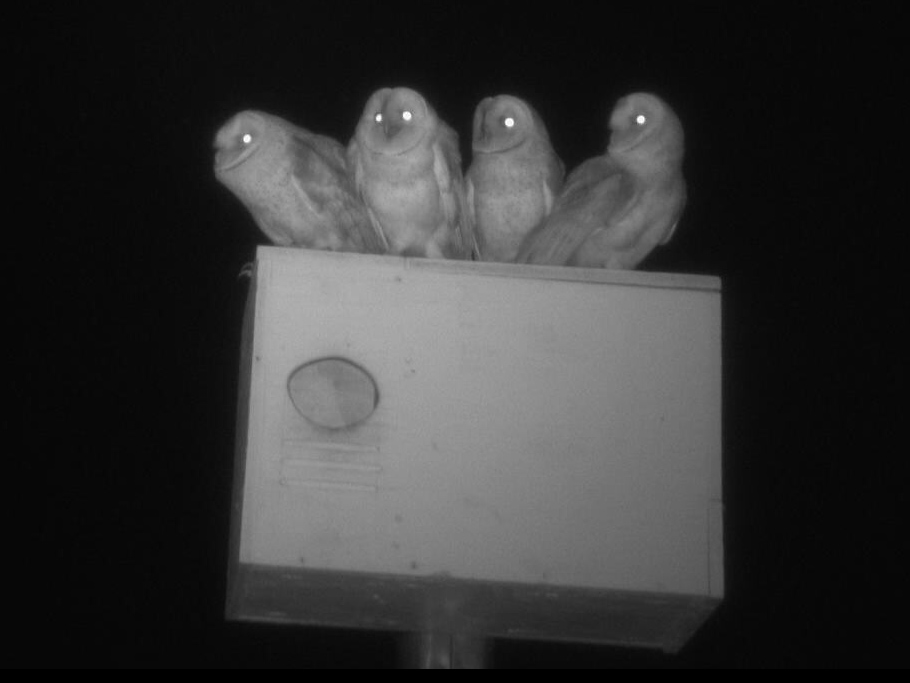
Critical Captures
Trail cameras are a great resource for catching key moments in the life cycle of a nest, such as the fledging of these Barn Owls!
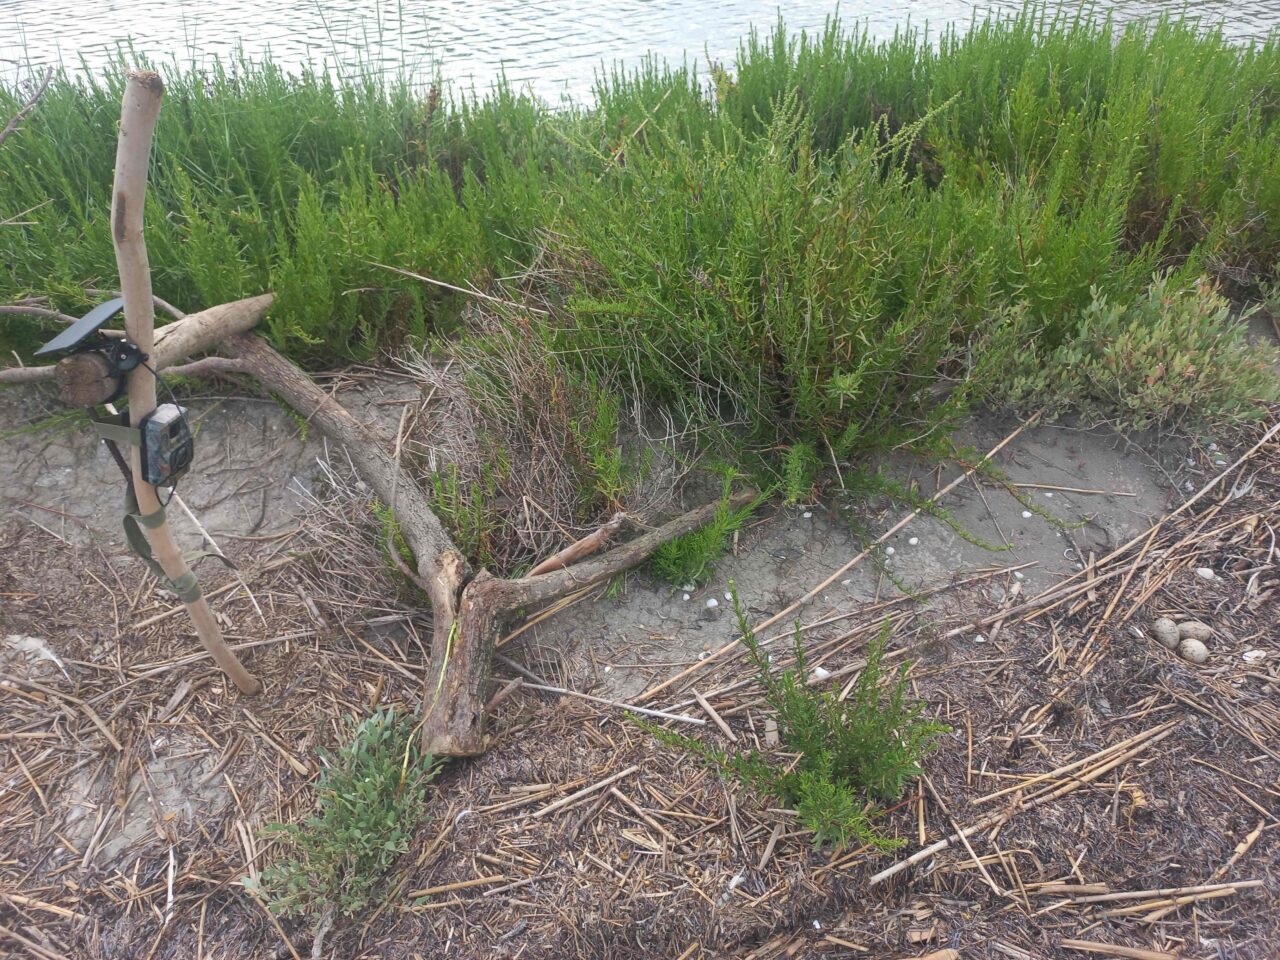
Once you’ve found a nest that you’d like to monitor and have a trail camera that is ready to deploy, first check the detection range of your camera. Away from the nest, measure out the range with a measuring tape so you can visualize the approximate radius around the nest you have to work with. This will help you quickly determine if there is a suitable tree trunk, branch, or stump nearby that can be used to secure the camera, or if a tripod will be needed. Trail cameras are usually designed for detecting large animals and typically aren’t ideal for close focusing, so we recommend not placing them directly next to the nest (i.e., about 6-10’ away). Be sure to test the camera is working properly before taking your supplies to the nest.
If the camera is being used in an area with frequent foot traffic, such as a park or golf course, consider using a theft-resistant cable lock to secure the camera to an immovable object like a tree. This usually isn’t necessary if you’re monitoring nests on private property, where a strap or tree mount could be used to secure the camera. Finally, mark the location of the trail camera using your phone or GPS before walking away—this will save you a lot of unnecessary hassle in trying to find it later once the vegetation has changed and you’ve had time to forget. Don’t rely on remembering where the nest is—the nest may be unrecognizable, or disappear entirely by the time you return!
Set It and (Don’t) Forget It!
Once your trail camera is in place, you may not need to revisit the site until the nest is over. Some cameras can send images to your device using a cellular or wifi network. Others will store the footage on an SD card until you retrieve it. Set a calendar reminder to retrieve the trail camera on a date when you’re fairly sure the nest will be finished.
If your camera is sending images to your device in real-time, you can enter your data into NestWatch as you go. Otherwise, you can enter data and any photos after you retrieve the camera.
Bird Safety Considerations
Eyes On A Eurasian Oystercatcher
Mount trail cameras at a safe distance; far enough to keep disturbance low, but still close enough that the nest activity is visible.
As always with nest monitoring, bird safety should be your top priority. Here are some do’s and don’ts to minimize stress to the birds:
- As previously mentioned, avoid cameras that use white flash because birds are especially sensitive to disturbance at night (and flashing a white light in their direction would certainly qualify as disturbance).
- Don’t keep them off their nests for extended periods of time, and never directly touch the nest.
- Don’t trim the vegetation immediately around the nest to create a better view; this could expose the nest to predators. Instead, try to find an angle with a good view (ideally facing north for best results).
- Worried about attracting predators to the nest? A meta-analysis of 19 studies revealed that nests monitored with cameras generally don’t experience increased predation over nests monitored by traditional methods, and may have slightly improved survival (Richardson et al. 2009). However, there are some exceptions, and using trail cameras in areas with very low vegetation (e.g., arctic tundra) may attract perching, visually-oriented predators like corvids (Henden et al. 2025).
- Installing the camera too early in the nesting cycle is a risk factor for nest abandonment, so you should wait until the eggs are laid to place the camera.
Snap to It!
Using a trail camera for nest monitoring can enrich your understanding of wild bird nesting behaviors, and it’s a good option for those wanting to go a little deeper into the science. As an added bonus, the trail camera can be used year-round to document other wildlife that may visit your property. On the downside, they can be rather expensive in the beginning (in addition to the camera, you may need to purchase a mount or cable lock, storage cards, a card reader, and batteries). Plus, if things don’t go well for the nest, you might witness upsetting footage. Although these can be important learning opportunities, you’re the best judge of your tolerance for this. To minimize disturbance to the nest, test your setup at home first before going out in the field, and follow our safety tips outlined above.
If you’re a trail-tested expert, feel free to share your experiences and tips in the comments! However, please note that we can’t recommend specific trail cameras for individual circumstances; for that you can try this trail camera selection guide.
References:
- Henden, J.-A., R. A. Ims, and, M. A. Strømeng. 2025. Trail cameras can greatly inflate nest predation rates. Journal of Wildlife Management 89:e22684.
- Meek, P. D. and A. Pittet. 2012. User-based design specifications for the ultimate camera trap for wildlife research. Wildlife Research 2012(39): 649-660.
- Richardson, T. W., T. Gardali, and S. H. Jenkins. 2009. Review and meta-analysis of camera effects on avian nest success. Journal of Wildlife Management 73(2):287–293.