
Monitoring hard-to-reach nest boxes? Try a camera pole!
July 7, 2026By Shubha Gautam, Cornell University Class of 2028
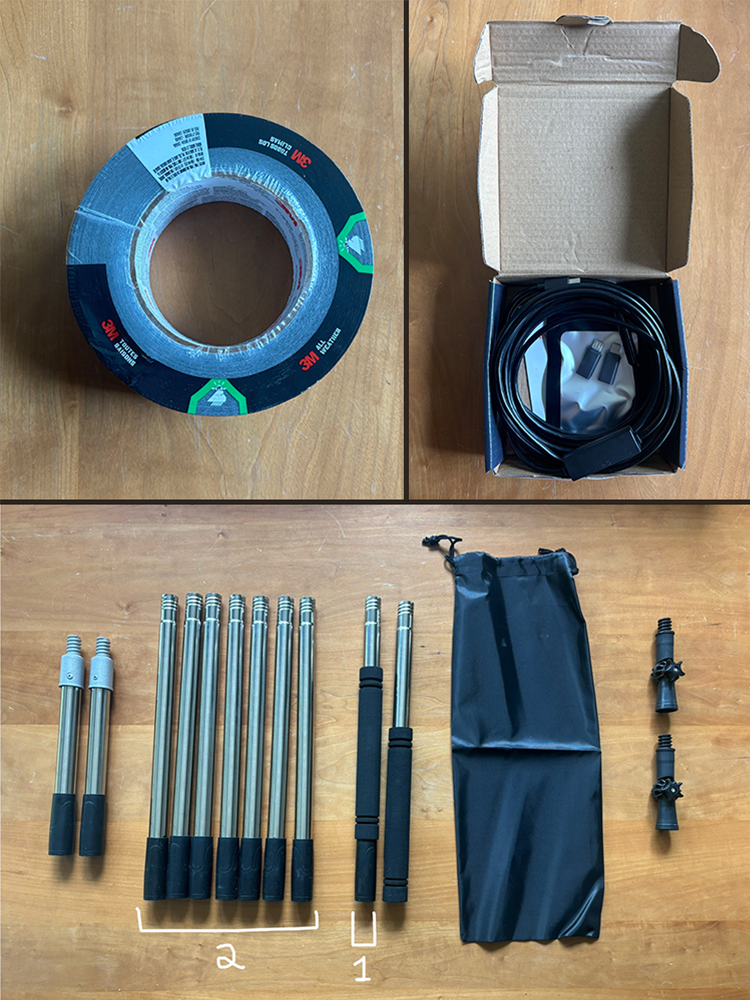
Suggested Supplies
(From upper left, clockwise): Duct tape, an endoscope, and extendable paint roller pole parts.
Do you maintain nest boxes for species that like to nest high up, like kestrels, owls, or ducks? Without a ladder, it’s difficult to check these boxes for any signs of nesting attempts. To address this problem, I’m going to show you how to make a pole with a camera at its end to see what’s going on inside these boxes. This seemingly daunting task can be deceptively easy.
Why make a nest-checking pole?
As a summer research assistant at the Cornell Lab of Ornithology focusing on NestWatch, my primary duty is to check more than 100 nest boxes we have scattered across the property. Typically, I can simply open up a box or stick a borescope (a small camera on a long wire that lets me peek into otherwise hard-to-check boxes) into a box, but for our ten kestrel, owl, and duck boxes, I can’t do the same. Located high up on trees and telephone poles, I need a tall, stable, yet lightweight device to help me see into boxes without dragging a ladder everywhere. This guide will be helpful in showing you how to make a long, easy-to-carry pole to reach any such boxes you may have.
How do you make this device?
To make this device, you’ll need the following: a hollow, extendable paint roller pole, duct tape, and a borescope. The paint roller and borescope I used go up to 11 ft (3.4 m) and 16.4 ft (5 m) in length, respectively. Our materials cost around $55, but the total cost will vary based on which supplies you use.
As a substitute for the paint roller pole, any sort of hollow pole should work, such as a PVC pipe (though, these may be heavier). Alternatively, instead of guiding the borescope through a hollow pole, any stable item of the correct length—such as a meter stick—could be used, with the scope wire secured to it with tape, zip ties, or Velcro straps. You could also use a telescoping pole if portability is important, or your nest boxes are at very different heights. The borescope I used has an adjustable light on its camera that helps us see in dark boxes. It also plugs into a cell phone, but you could use a GoPro camera or a similar device instead.
I built the pole in the following steps:
Use the arrows below to navigate through the steps, or download a printable set of instructions.
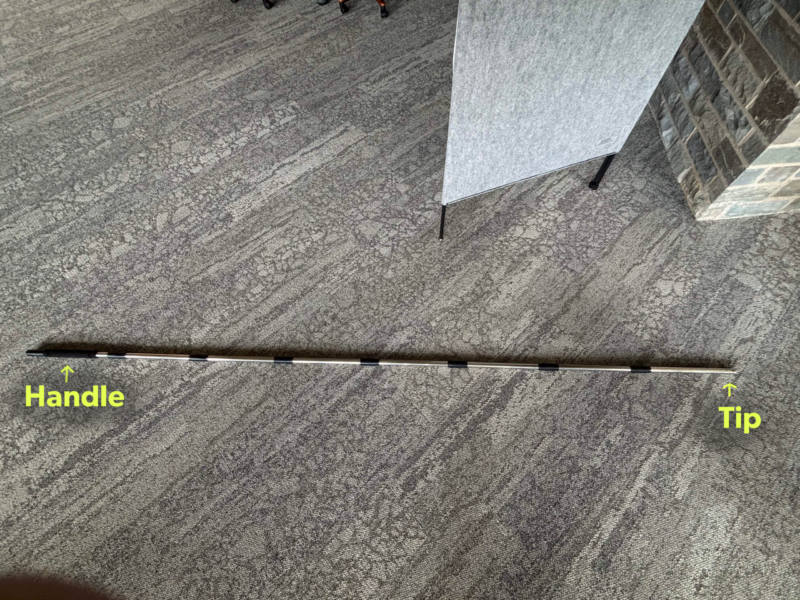 1. I picked out the hollow pole segments and assembled them. I attached pole “1” in the above image to the seven segments labeled “2.” They easily twist together, bringing the total length to 10 ft (3 m).
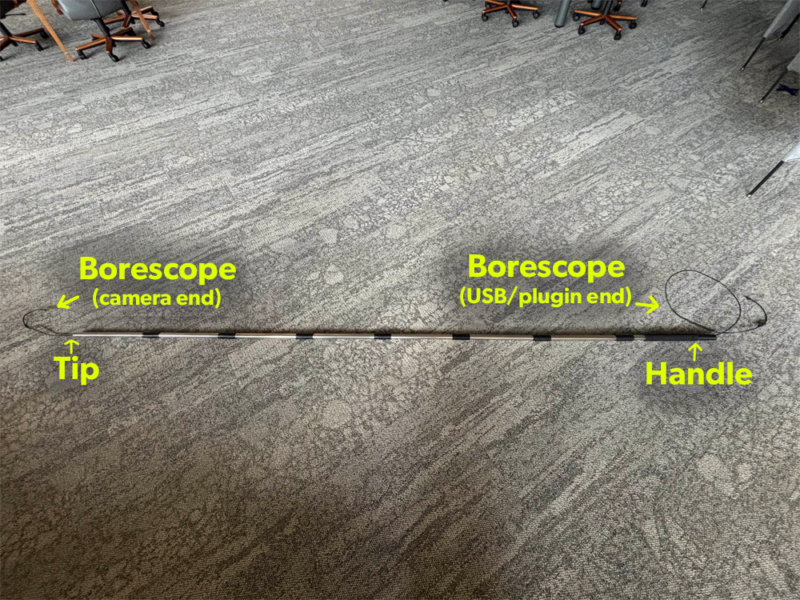
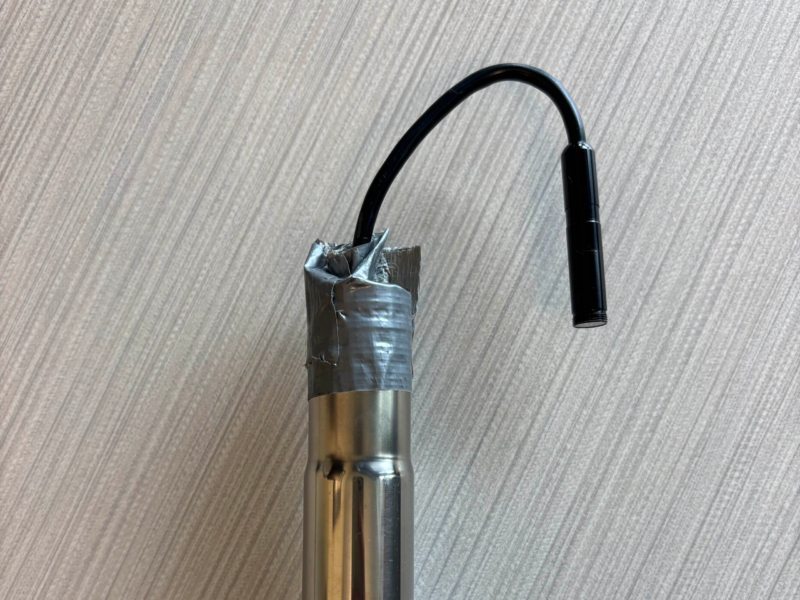
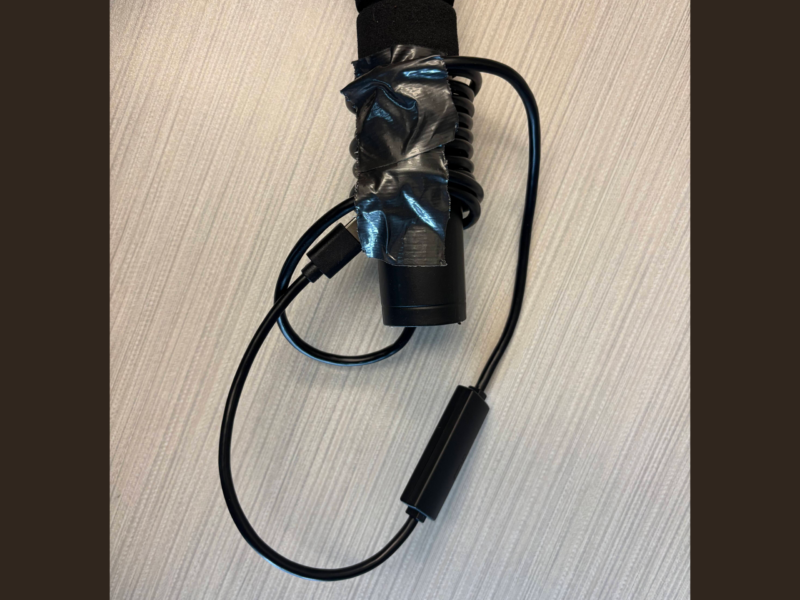
Depending on the product you’re using, you may only be able to access the camera after downloading an app to your phone. You can then take photos and videos of what the scope camera sees. The media I record with my borescope doesn’t automatically save to my Photos app, so if the model you use behaves the same way, make sure to individually save the photos and videos you want to keep.
Now you have a completed nest-checking pole! I ended up adding marks to my pole to indicate length on my pole to help me measure the height of the boxes as well.
Endoscope In Action
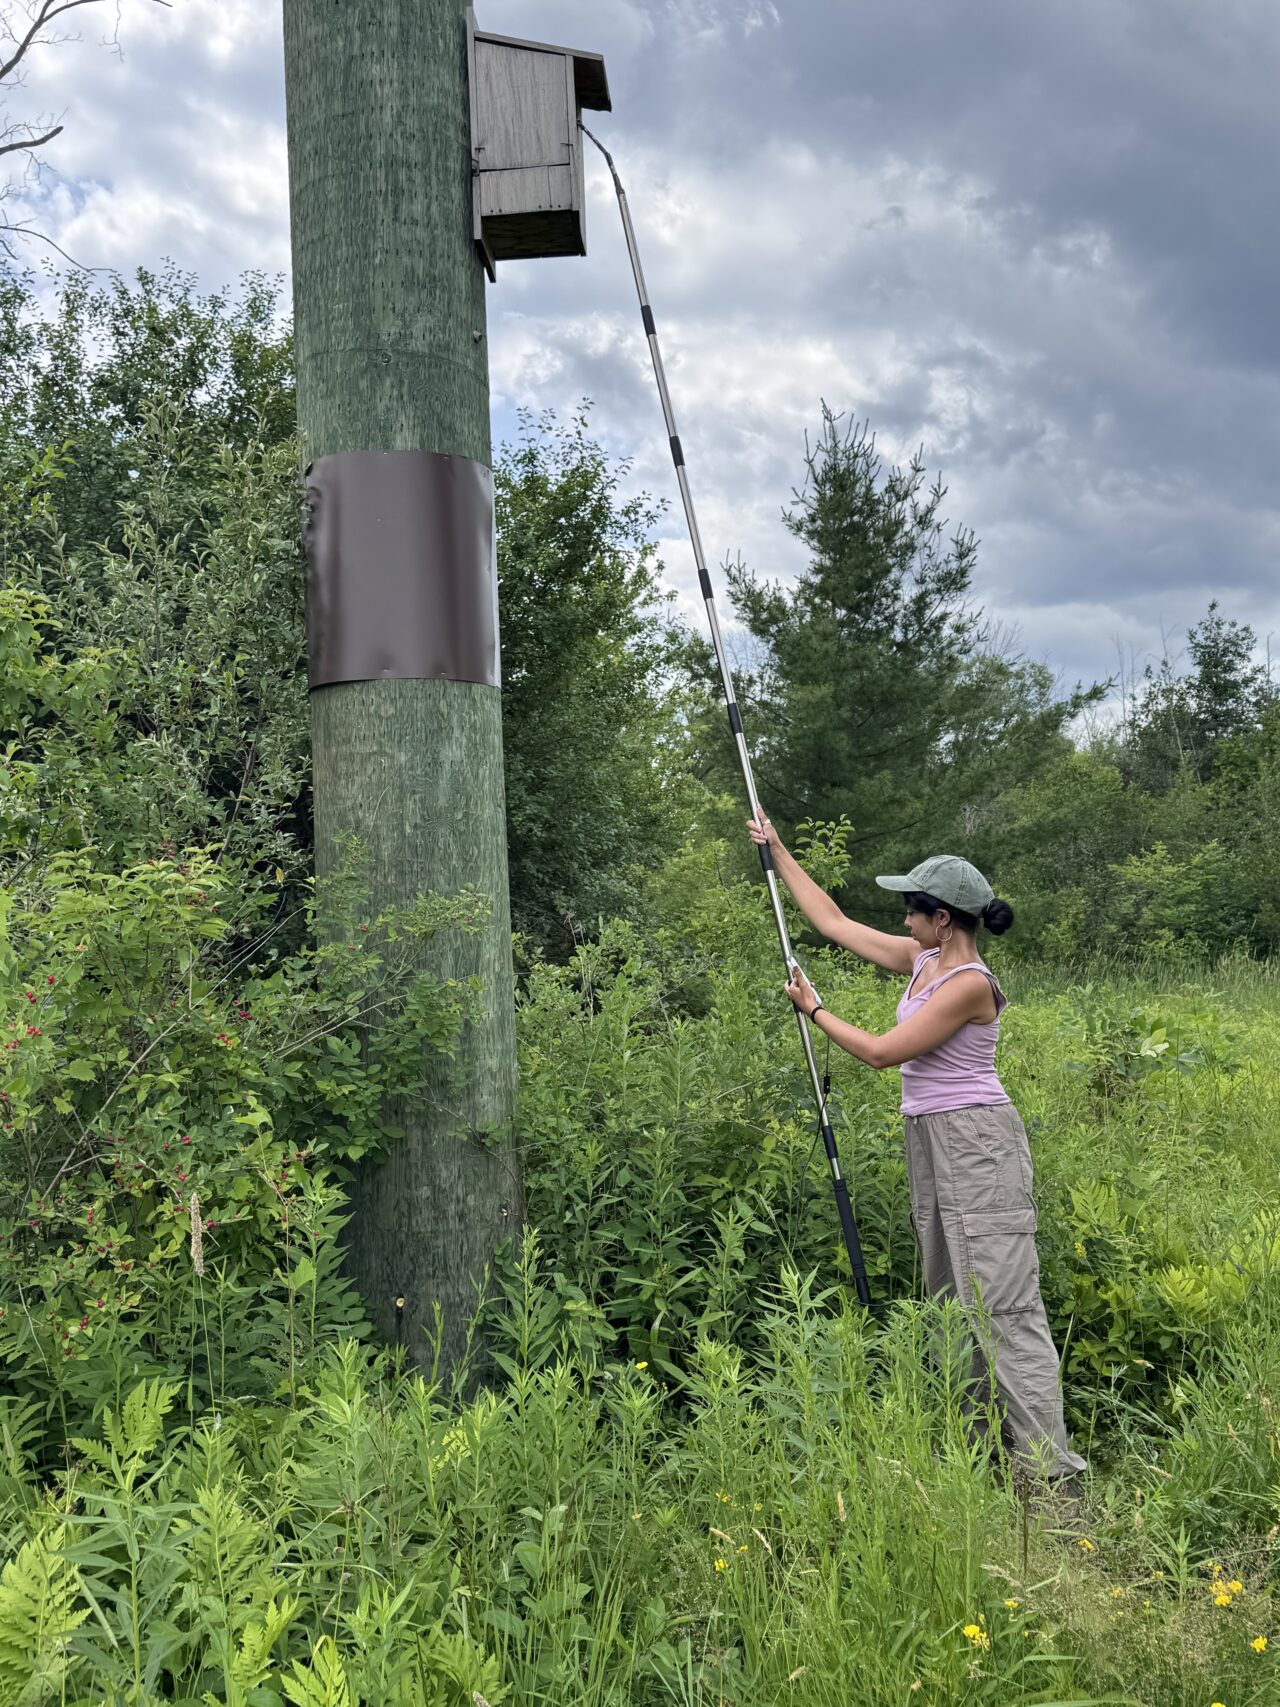
The author checking an American Kestrel nest box that is mounted 12 ft (3.7 m) high.
How do you use it?
Using it is the easiest part. Although cumbersome in length, the pole is light and stable when carried around. Following NestWatch protocol, tap on the side of the boxes with the pole to alert any birds inside and give them a chance to exit. Make sure the cable is attached to your phone first, then simply insert the hooked end of the borescope into the entrance hole. You should be able to see inside and look for a nest! You can also find more tips on using a borescope for nest-monitoring here, with or without the pole.
Let us know what works for you in the comments!
14 comments on “Monitoring hard-to-reach nest boxes? Try a camera pole!”
I have a good natured challenge for you. I received a nest box as a Christmas present. I live on the tenth floor of a 12 floor building. Access to the roof is denied. Outside the back window of the apartment I secured a board inside the window frame positioned so the box could be seen protruding and facing outward, yet I can reach out the window and retrieve the box. How do I fashion an endoscope onto a collapsable pole for this location?
Email me for the answer if you want one.
Spiffy idea! Would be interested in actually seeing the alleged instructions. As is too often the case currently, authors get caught up in the fancy graphics rubbish and either impede or preclude the reader from seeing the intended text/imagery.
Please make this into a useful paper and include the instructions/images in the body of the text rather than some useless fancy gizmo window.
Thanks.
Hi Jeff, Thanks for your feedback. You can also download a printable version of the instructions here.
I’ve been using this same setup on Kestrels and other birds for a couple of years now. It works great.
One thing I would suggest is to not do any tapping on the boxes. This just adds stress and makes the birds leave for no good reason. It could also force fledge young birds if close to that point at the time. The birds hear you coming anyway. I find that almost all the incubating birds stay on the nest when I quietly insert the camera. They just look up at it but stay put. This saves them a lot of energy and stress. If they do leave while the camera is looking in, the pole is so light that they just bump it out of the way or jump over it. No real risk of injury and much less risk in forcing every bird to leave.
Good job putting this great camera idea out there. Thanks!
Hi Chris, As you mention, it’s important not to startle a bird as you approach the nest; this may cause it to accidentally knock out eggs or young when it flies off. Before approaching the nest, we agree, giving the birds ample time to slip off the nest quietly by rustling branches or making noise during your approach is a good first step. Whenever possible, we recommend waiting a few minutes to see if the bird leaves on its own. If a monitor doesn’t see any activity at the box on approach, then nest boxes should be tapped first, then tapped again when open to allow the parent to slip away before the monitor stares directly into the box. These recommendations are part of the NestWatch Code of Conduct.
Sounds great. I have wanted an endoscope/horoscope for a while.
What brand or model would Cornell recommend? In case it matters, I have an iPhone.
Hi Virginia, we aren’t able to recommend specific models, but our team picked this one up on Amazon. There are many endoscope/borescope models available, typically with camera wires of varying lengths. We encourage you to pick a model that has the right connections for your phone or other device, and is the right length to work for your needs. Some higher end models even have their own viewing screen, with no phone necessary.
Endoscopes have not worked well for us. I highly recommend a borescope camera which has a wide angle and allows to see box content without having to stick the camera into the box.
There is a ready to go camera that can be purchased online for about 70 CAD and extends to 7ft. I love it and have used it all season.
Hi Kristina, The model we purchased was labeled as an endoscope, though clearly it is not meant to be used in a medical setting. We’ve updated the post to reflect the correct terminology. Essentially, the tool is a long wire with a camera at one end, and which either plugs into a device or comes with its own display to view the camera screen. We encourage you to use whichever borescope model you find that both fits your budget and works best for your needs.
What material are you wrapping around the trunk as a predator guard ? Where do you find that?
Hi Susan, The predator guard shown in the images is metal sheeting, which was purchased at a local hardware store in a 50ft roll and cut to fit around the circumference of the trees and poles nest boxes were mounted on.
l love the step-by-step instructions! This option is much safer than climbing up on a ladder every time! Great article!
and probably works better than my current setup – a camera attached to the end of a broomstick, ha!
Oh got me beat on duct taping my phone to an old 2×4